15 Stunning Outdoor Grill Station Ideas for a Backyard Upgrade
This post contains affiliate links. As an Amazon Associate, I earn from qualifying purchases at no additional cost to you. I only curate products that align with the Comfylish aesthetic.
If you’re looking to elevate your backyard BBQ experience, an outdoor grill station might be just what you need! It’s a fantastic way to level up from a basic kettle grill without going all out for a complete outdoor kitchen. Adding some essential prep space, weatherproof storage, and a bit of your personal flair can really change how you cook and entertain outdoors. Whether you’ve got a cozy concrete patio or a spacious deck, we’ve gathered 15 amazing outdoor grill station ideas that show how easy it can be to enhance your backyard. Let’s discover the perfect setup for your space together!
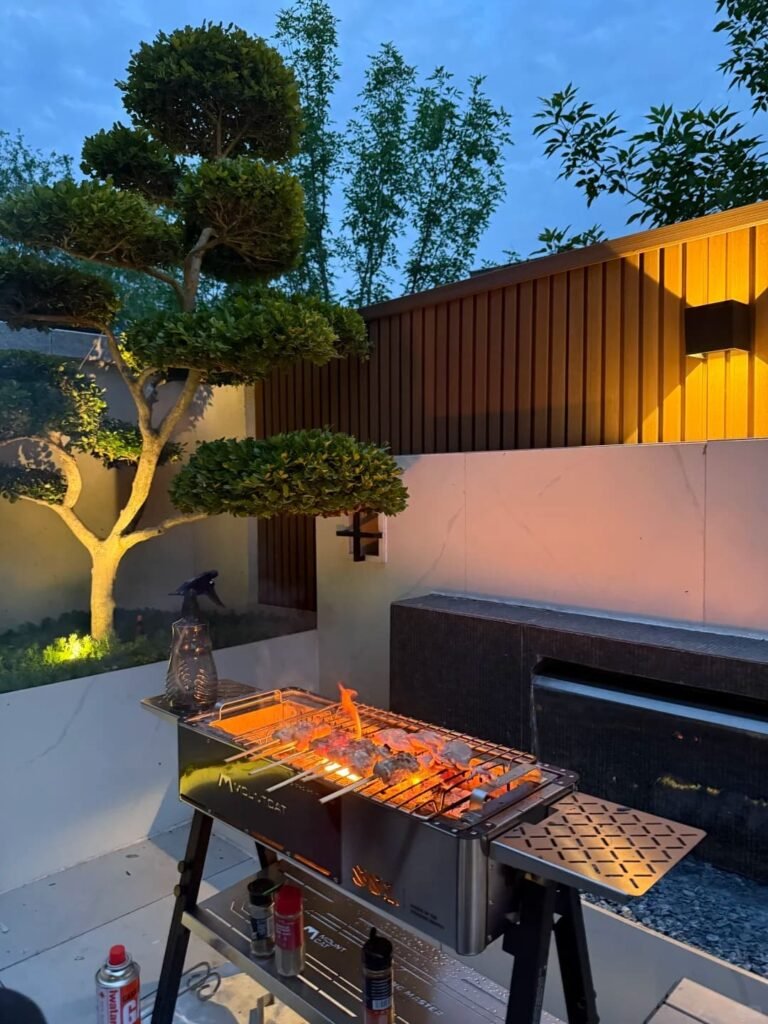
rednote / @Jenny简妮
The Difference Between a Backyard Grill and an Outdoor Grill Station
Before we dive into the inspiration, let’s clarify what we’re actually talking about. A standalone grill sitting on the grass or a basic deck is a tool. It gets the job done, but it forces you into an awkward dance of balancing plates on the nearest flat surface, running inside for forgotten seasonings, and setting tongs down on the ground.
The Outdoor Grill Station: A Dedicated Zone
By contrast, a grill station centers around the grill but integrates at least one of these three critical elements:
- Stable Countertops: Plenty of room for prep work and staging.
- Enclosed Storage: A dedicated spot for tools, fuel, and accessories.
- Structural Surround: A defined frame that anchors the space.
The “Sweet Spot” vs. The Full Kitchen
It’s important to distinguish this setup from a complete outdoor kitchen. To keep things manageable and affordable, a grill station typically excludes:
- ❌ Sinks/Plumbing
- ❌ Full Refrigeration
Adding these features pushes the project into a different category, one that requires a much larger investment and a team of contractors.
Inspiration for Every Budget
These 15 ideas demonstrate that a better grilling experience is within reach, regardless of what you want to spend:
- Entry-Level (Under $100): Quick fixes for immediate organization and convenience.
- Mid-Range ($100 – $1,000): Substantial upgrades for custom storage and expanded prep space.
- High-End (Several Thousand): Permanent, professional-grade anchors for a high-end look.
1. The Repurposed Workbench Grill Station for a Quick & Budget-Friendly Setup
The easiest way to create your own outdoor grill station is to change your perspective on the grill. Instead of viewing it as an isolated piece, consider it a component of a larger setup. Look for a heavy-duty, used woodworking bench or a stainless steel restaurant prep table in the secondary market. By positioning a freestanding gas or charcoal grill right against one long edge of the bench, you can instantly create an outdoor grill station that offers thirty square feet of preparation space.
Why It Works
This approach is the ultimate “quick win” for your backyard, offering several key benefits:
- Instant Workspace: Gain a massive prep area without a permanent build.
- Flexibility: Perfect for renters or homeowners who enjoy rearranging their outdoor layout.
- Cost-Effective: Utilizes the secondary market to find professional-grade surfaces at a fraction of the cost.
The Key to Success
To turn a basic bench into a functional outdoor grill station, focus on these two steps:
- Weatherproofing: Treat any wood surfaces with a high-quality weatherproof sealant to handle the elements.
- Organization: Add heavy-duty hooks to the side of the bench to keep your tongs, spatulas, and brushes within arm’s reach.
Heat & Safety: Protecting Your Workbench
Because most workbenches are made of wood, safety is a critical part of this setup. To ensure your outdoor grill station is as safe as it is functional, keep these two precautions in mind:
- Maintain Safe Distance: Never place your grill directly against bare wood. Keep at least 12 to 24 inches of clearance between the grill’s heat source and the workbench to prevent scorching or fire hazards.
- Add a Heat-Resistant Top: To bridge the gap safely, consider “topping” the end of your bench closest to the grill.
- The Upgrade: Install a sheet of galvanized steel, a piece of granite, or even oversized ceramic tiles.
- The Benefit: This creates a fire-safe landing zone for hot grates, searing chimneys, or heavy cast-iron pans.
Although it’s not a permanent installation, this setup provides the essential counter space that defines a true grilling zone.
2. The Cinder Block and Cedar Plank Grill Station
This is a classic budget-friendly solution for building a functional outdoor grill station without needing advanced construction skills. By dry-stacking concrete cinder blocks, you can create two parallel pillars, leaving a space in the middle to accommodate a standard 4-burner gas grill.
The “Magic” Components
The transformation from a pile of blocks to a polished outdoor grill station relies on a few key design choices:
- The Cedar Countertop: A single, thick cedar plank laid across the top row of blocks. Cedar is naturally rot-resistant and provides a warm, rustic contrast to the industrial grey blocks.
- The Integrated “Cubbies”: By facing the hollow cores of the cinder blocks outward, you create built-in storage for grill brushes, hot sauces, or a roll of paper towels.
- Minimalist Design: This setup offers maximum functionality with a clean, architectural look that fits almost any backyard aesthetic.
Heat & Safety Precautions
While cinder blocks are fire-resistant, the cedar plank is not. To keep your station safe:
- Mind the Gap: Ensure there is at least 2–4 inches of clearance between the grill body and the edge of the cedar planks to prevent heat damage or charring.
- Secure the Planks: Use construction adhesive or heavy-duty brackets to ensure the cedar doesn’t slide when you’re moving heavy plates or prepping meat.
Ensuring Stability & Weather Resistance
Because this is a “dry-stack” build (meaning no mortar), it is essential to ensure your outdoor grill station stays level and survives the elements. A few simple steps during assembly will make the difference between a shaky setup and a permanent fixture:
- Foundation is Key: Never stack cinder blocks directly on soft grass or loose dirt, as they will sink or tilt over time.
- The Fix: Clear a small area and lay a base of compacted gravel or a few leveling pavers. This ensures your pillars remain perfectly vertical.
- Vertical Stability: If your pillars are more than three blocks high, they can become top-heavy.
- The Fix: Drive a piece of rebar through the hollow centers of the blocks into the ground, or fill the hollow cores with gravel to add “ballast” and weight to the base.
- Protecting the Wood: While cedar is rot-resistant, it isn’t “rot-proof” when exposed to constant rain or snow.
- The Fix: Apply a UV-rated exterior sealant to the cedar plank once a year. This prevents the wood from turning grey and stops moisture from warping the surface.
- Block Maintenance: In very humid or shady areas, concrete can grow moss or algae.
- The Fix: A quick spray with a pressure washer or a scrub with a mild bleach solution every spring will keep the industrial-grey look sharp and clean.
This project is perfect for a Saturday afternoon, providing a permanent, sturdy anchor for your cooking without the need for mortar or complex tools.
3. The Rolling Cart and Pellet Hopper Combo
For those who value flexibility, a portable outdoor grill station is an excellent choice. This setup enhances the traditional grill cart concept in a significant way. Instead of depending on the flimsy side shelves that typically come with a grill, you can invest in a heavy-duty stainless steel rolling cart with locking casters.
By positioning the cart next to the grill, you create an L-shaped outdoor grill station that operates as a cohesive, mobile unit.
Why the Mobile Approach Wins
This setup is the ultimate solution for anyone who values adaptability and “on-the-fly” organization:
- The Shade-Chaser: Because the entire station is on wheels, you can move your workspace to follow the shade in the summer or stay out of the wind.
- Compact Storage: During a snowstorm or heavy rain, you can roll the entire unit into the garage or a shed, keeping it pristine.
- Expanded Surface: It moves you away from cramped grill-side trays to a professional-grade prep area.
Organization & Stability
To maximize the utility of your rolling cart, consider these functional upgrades:
- Dedicated Bins: Use the lower shelves for a pellet bucket or charcoal chimney. Add a small plastic bin for clean utensils to keep them dust-free.
- The “Landing Zone”: Dedicate the top surface to a large, heavy cutting board. This gives you a stable place to carve meat immediately after it leaves the grates.
- Safety First: Always ensure the locking casters are engaged before you start cooking. A rolling prep table is a hazard if it moves while you are slicing or handling hot pans.
Weather Resistance & Maintenance
- Material Matters: Choose a cart made of 304-grade stainless steel to prevent rust if it’s frequently exposed to humidity.
- Wheel Care: Periodically spray the casters with a silicone lubricant to ensure they don’t seize up from outdoor grit and grime.
- Cover Strategy: Even though it’s mobile, a single large cover that fits over both the grill and the cart will save you from having to wipe down the prep surface every time you want to cook.
4. The Pallet-Wood Privacy Screen Station
Sometimes the biggest challenge of cooking outside isn’t the food, but the environment, specifically gusty winds or a lack of privacy from neighbors. This outdoor grill station idea solves both problems while adding valuable vertical storage.
By constructing a sturdy vertical frame and cladding it with reclaimed pallet wood, you create a functional windbreak that defines your cooking zone without the need for a roof.
The Anatomy of the Build
- The Structure: Use 4×4 posts anchored in concrete-filled buckets (for portability) or directly into the ground for a permanent feel.
- The Cladding: Use reclaimed pallet wood to create a rustic, textured wall.
- The Workspace: Place your grill and a simple console table in front of the screen to complete the station.
Why the Vertical Wall is a Game Changer
This “back-of-house” element transforms a simple BBQ into a professional-grade outdoor grill station:
- Wind Protection: Prevents gusts from blowing out your burners or causing temperature fluctuations.
- Tool Organization: Provides a surface to mount a magnetic knife strip or heavy-duty hooks for oversized tools.
- Integrated Lighting: Offers a perfect mounting point for a shop light or string lights for nighttime grilling.
- Privacy: Creates an intimate “outdoor room” feel, shielding you from the view of neighboring yards.
Stability & Safety Precautions
- Wind Loading: A solid wood wall acts like a sail. Ensure your posts are deeply anchored, or leave small gaps (about 1/2 inch) between the pallet slats to allow some air to pass through while still breaking the wind.
- Fire Safety: Pallet wood is dry and highly flammable. Maintain at least 12–18 inches of clearance between the back of the grill and the wood screen to prevent heat damage or fire hazards.
- Wood Treatment: Pallets are often treated with chemicals or exposed to bacteria.
Pro Tip: Look for the “HT” (Heat Treated) stamp on the pallets rather than “MB” (Methyl Bromide). Sand the wood thoroughly and apply an exterior-grade stain to prevent splinters and rot.
Maintenance for Longevity
- Seal the Posts: If using concrete buckets, ensure they have drainage holes or are capped to prevent water from pooling around the base of the wood posts.
- Seasonal Refresh: Re-stain the pallet wood every two years to maintain the color and protect the screen from UV damage and moisture.
5. A Wall-Mounted Fold-Down Grill Station for Small Spaces
If your patio is a narrow strip of concrete, a full-sized outdoor grill station may completely obstruct the walkway. A practical solution is to use a folding outdoor grill station that can be attached directly to the wall of your house or a sturdy railing.
This design is perfect for urban balcony residents or anyone with limited space, as it provides a dedicated workspace without taking up permanent floor space.
The Design Concept
- The Hardware: Utilize heavy-duty folding shelf brackets designed to lock securely and support significant weight.
- The Surface: Install a butcher block or exterior-grade wood top that folds flat against the wall when the grill is cool, and the party is over.
- The Workflow: Position the grill so the shelf acts as an immediate side-table for saucing ribs, resting meat, or plating burgers.
Why It’s Perfect for Small Spaces
- Zero Footprint: When folded, the station takes up only a few inches of depth, keeping your walkways clear.
- Stable Prep: Unlike flimsy “clip-on” grill trays, a wall-mounted shelf provides a rock-solid surface for heavy platters.
- Versatility: When you aren’t grilling, it can serve as a potting bench or a high-top bar table for drinks.
Heat & Safety Essentials
Because this station is attached to your home or a railing, safety is the top priority:
- Check Your Clearances: Ensure the shelf is mounted at a safe distance from the grill’s lid when open. Standard safety guidelines recommend at least 12 to 24 inches of lateral space to avoid scorching the wood or the wall.
- Wall Protection: If mounting to vinyl siding or wood, consider adding a small heat shield (like a piece of stainless steel or decorative tile) to the wall behind the grill.
- Weight Limits: Always check the load rating of your brackets. A heavy cast-iron pan and a tray of steaks can easily exceed the capacity of standard decorative brackets.
Weather Resistance & Maintenance
- Wood Care: Since butcher block is prone to warping, it is non-negotiable to seal all six sides (including the bottom) with an exterior-grade polyurethane or a heavy-duty food-safe oil.
- Rust-Proof Hardware: Ensure your folding brackets are made of stainless steel or have a high-quality powder-coated finish to prevent them from seizing up due to rust.
- Seasonal Storage: If the shelf is held on by simple pins, you might consider removing the wooden top during the harshest winter months to extend its life.
6. A Framed Outdoor Grill Station for a Durable Built-In Look
This is the secret for professional DIYers to create a custom outdoor grill station on a budget. Instead of using heavy, expensive masonry, you can build a lightweight yet sturdy framework that can be finished to match any style.
The Construction Strategy
This method allows you to build a professional-grade “box” that looks like it cost five figures for a fraction of the price:
- The Skeleton: Build a frame using pressure-treated lumber and steel framing angles for maximum structural integrity.
- The Sheathing: Cover the frame in HardieBacker cement board. This creates a moisture-resistant, fire-rated surface that acts as the perfect canvas for finishes.
- The Finish: You can customize the look by applying:
- Thin Stone Veneer for a high-end masonry look.
- Porcelain Tile for a modern, easy-to-clean surface.
- Smooth Stucco for a sleek, Mediterranean feel.
Why This Method Wins
- Custom Integration: It is the best way to accommodate a built-in grill head and custom cabinet doors for a seamless, permanent appearance.
- Durability: Unlike simple wood builds, the cement board provides a rigid, non-combustible base that won’t rot or warp.
- Lightweight masonry: You get the look of a stone island without the extreme weight that would require a massive concrete pad.
Heat & Safety Precautions
Even with fire-rated cement board, the internal wood framing needs protection:
- Insulated Jackets: If you are using a built-in grill head, most manufacturers require an insulated grill jacket. This stainless steel sleeve sits between the grill and your HardieBacker/wood frame to prevent heat transfer.
- Venting is Vital: Because this is an enclosed box, you must install small vent panels in the base. This prevents dangerous gas buildup (from a leak) or excessive heat from becoming trapped inside the structure.
Stability & Weather Resistance
- Leveling: Ensure your frame is perfectly level before sheathing. Use adjustable plastic shims or “feet” at the base of the wood frame to keep the lumber from sitting directly in puddles.
- Sealing the Joints: Use alkaline-resistant mesh tape and thin-set mortar on all cement board seams. This prevents your tile or stone veneer from cracking as the structure settles.
- Countertop Choice: For this build, a granite slab or poured concrete top is the perfect finishing touch to ensure the station is 100% weatherproof for decades.
7. The Stainless Steel Cabinet Island
If you live near the coast, in a humid climate, or simply want an outdoor grill station that requires almost no maintenance, a stainless steel grill station is the perfect solution. By utilizing pre-manufactured modular cabinets, you can easily create a high-end, commercial-grade setup with minimal assembly effort.
The Modular Advantage
Instead of building from scratch, you purchase standalone units designed to flank your grill. This allows you to customize the layout:
- Flexible Configurations: Mix and match double-door cabinets with drawer combos to create a seamless U-shape or L-shape station.
- Commercial Aesthetic: Pairing a high-end ceramic or gas grill with sleek steel creates a modern, professional look.
- Zero Construction: These units arrive ready to be positioned, leveled, and bolted together.
Why It’s the Best Choice for Harsh Climates
- Pure Durability: High-quality stainless steel (specifically 304-grade) stands up to rain, sun, and salty air without fading.
- Hygienic Surface: It wipes clean with a simple spray of mild cleaner, making it the most sanitary option for food prep.
- Weather-Proof Storage: Enclosed steel cabinets keep your charcoal, wood chunks, and tools bone-dry even in driving rain.
Heat & Safety Essentials
- Heat Dissipation: Stainless steel is excellent at shedding heat, but it can get very hot to the touch in direct sunlight. Consider placing this station under a pergola or using an umbrella during peak summer hours.
- Integrated Units: If you are dropping a grill head into a stainless cabinet, ensure the unit is designed for that specific grill brand to maintain proper airflow and gas safety.
Stability & Maintenance
- Leveling Feet: Most stainless cabinets come with adjustable feet. Use them to ensure your prep surface is perfectly level, especially on slightly sloped patios designed for water runoff.
- Salt Air Protection: If you are within a few miles of the ocean, even stainless steel needs a “shield.” Apply a stainless steel protectant or a light coat of mineral oil once a month to prevent “tea staining” (tiny surface rust spots).
- Caster Options: Some versions come with wheels. If you choose this, ensure they are heavy-duty locking casters to prevent the “island” from drifting while you’re scrubbing the grill grates.
8. A Two-Tier Concrete Countertop Grill Station for a Modern, Functional Layout
This concept elevates the traditional cinder block design by adding a touch of elegance. Instead of simply dry-stacking the blocks, you can create a sturdy, mortared base or use a wooden frame to pour your own custom concrete countertops with a mold.
A standout feature of this outdoor grill station is its “double-decker” design, which effectively utilizes vertical space for both cooking and robust storage.
The Design Concept: Two-Tiered Utility
This approach maximizes your footprint by providing two distinct levels of functionality:
- The Upper Tier: A seamless concrete countertop with a precision cutout where the grill sits flush. This provides a sleek, professional-grade prep surface.
- The Lower Tier: A reinforced concrete slab positioned about six inches off the ground. Instead of a standard cabinet, this open shelf serves as a heavy-duty “landing zone.”
Why the Lower Shelf is a Game Changer
By utilizing the space underneath the grill, this outdoor grill station stays organized and efficient:
- Heavy Storage: The perfect spot for a weighted cooler, large bags of charcoal, or heavy cast-iron Dutch ovens.
- Airflow: The open design allows for excellent ventilation, which is ideal for high-heat charcoal grilling or wood-fired setups.
- Visual Weight: The solid concrete tiers give the station a permanent, architectural feel that anchors your entire backyard.
Heat & Safety Essentials
- Thermal Mass: Concrete is naturally fire-resistant and excellent at handling heat. However, to prevent the countertop from cracking over time due to extreme temperature swings, ensure the grill has a 1-inch expansion gap around the cutout.
- Reinforcement: Because concrete is brittle, the upper and lower slabs must be reinforced with rebar or wire mesh to prevent them from snapping under the weight of the grill or heavy storage items.
Stability & Weather Resistance
- Foundation: A concrete station is incredibly heavy. It must be built on a thick concrete pad or a deeply compacted gravel base to prevent the structure from sinking or tilting.
- Sealing the Surface: Raw concrete is porous and will absorb grease, wine, and marinades.
- The Fix: Apply a food-safe, penetrating concrete sealer to both levels. This makes the station stain-resistant and much easier to wipe down after a messy cookout.
- Winter Protection: In cold climates, water can get into tiny pores in the concrete, freeze, and cause “spalling” (surface flaking). A seasonal application of a water-repellent sealer is essential for longevity.
Final Touch
This build is for the homeowner who wants a “brutalist” yet refined look—combining raw industrial materials with a clever, multi-level workflow.
9. The Pergola-Integrated Grill Station
Constructing your outdoor grill station directly beneath or next to the corner post of a pergola elevates it from mere furniture to a permanent architectural feature. This design choice anchors the cooking area within your landscape, transforming it into a true “destination” in your backyard.
The Design Strategy
- The Anchor: Use the existing vertical posts of the pergola as the structural backbone for your countertops and storage.
- The “Enclosure” Effect: The overhead beams provide a sense of place and intimacy that a standalone grill simply cannot match.
- Integrated Utilities: The pergola posts offer a natural pathway to hide unsightly wires or pipes. You can run a dedicated gas line or electrical conduit up the post to fuel the grill and power accessories.
Why the Pergola Approach Wins
- Atmosphere & Lighting: The overhead structure is the perfect place to hang string lights, mount a ceiling fan, or install dimmable LED task lighting.
- Climate Control: You can easily add outdoor-rated curtains or a retractable canopy to provide shade during the day or a windbreak in the evening.
- Permanent Presence: By integrating the station into the pergola, it becomes part of the home’s footprint, potentially increasing property value and aesthetic appeal.
Heat & Safety Essentials
Because pergolas are often made of wood or vinyl, managing heat and smoke is your top priority:
- Smoke Clearance: Ensure the pergola is tall enough (at least 8–9 feet) to allow smoke to dissipate. If the roof is solid, you may need to install a vent hood or a chimney extension.
- Fire Clearances: Maintain a safe distance between the grill and the pergola posts. If the grill is positioned too close to a post, install a heat shield made of stainless steel or non-combustible cement board.
- Open Roof Design: A traditional “slatted” pergola roof is best for grilling, as it allows heat and smoke to rise and escape freely.
Stability & Weather Resistance
- Post Protection: If your grill station includes a countertop that wraps around a pergola post, ensure there is a waterproof seal (like silicone caulk) where the counter meets the wood to prevent rot.
- Structural Load: If you are attaching heavy stone or concrete counters to the pergola, ensure the posts are properly footed in concrete to handle the additional weight.
- Utility Shielding: Ensure any gas lines or electrical outlets run along the posts are weather-rated (GFCI) and protected by a conduit to withstand rain and UV exposure.
This setup is the ultimate choice for the homeowner who wants their outdoor grill station to feel like a seamless extension of their indoor living space.
10. The Resin Cabinet All-Weather Station
For anyone seeking a high-end appearance with no maintenance required, the resin cabinet solution is the best option. Many outdoor brands offer kitchen units that replicate the look of luxurious wood or textured wicker, but they are constructed entirely from UV-protected polypropylene resin.
By positioning these ready-to-assemble units on either side of your grill, you can create a cohesive and polished outdoor grilling station in as little as two hours.
The Practical Benefits
This “smart” approach is designed for busy families who want to spend their time cooking rather than maintaining cabinetry:
- Durability Without the Work: These units are waterproof, fade-proof, and can be hosed down in seconds to remove grease or dust.
- Versatile Storage: Unlike wood, resin cabinets are moisture-sealed, making them perfect for storing grill covers, outdoor cushions, or even children’s toys alongside your BBQ tools.
- Speed of Assembly: You get a cohesive, professional-looking kitchen island without a construction crew or specialized tools.
Heat & Safety Essentials
Resin is a type of plastic, so heat management is the most important factor for this build:
- The Gap Rule: Maintain a strict 6- to 10-inch clearance between the sides of the grill and the resin cabinets. Direct contact with a hot grill housing will cause the resin to warp or melt.
- Standalone Units: Ensure your grill is a freestanding model with its own legs or cart. Never “drop” a built-in grill head directly into a resin cabinet unless the manufacturer has provided a specific, fire-rated insulation kit.
- Lid Clearance: When the grill lid is open, ensure it doesn’t lean back against a resin backsplash or side panel.
Stability & Weather Resistance
- Weighting the Base: Because resin is lightweight, these cabinets can be prone to shifting or tipping in high winds when empty.
- The Fix: Store your heaviest items (like bags of charcoal or weighted base plates) on the bottom shelves to lower the center of gravity.
- Leveling on Patios: Most resin units don’t have adjustable feet.
- The Fix: Use plastic shims to ensure the cabinets are level with the grill. This prevents items from rolling off the counter and ensures the doors hang straight.
- UV Protection: While these are UV-protected, applying a simple plastic protectant spray once a year can help maintain the deep “wood-look” color and prevent the material from becoming brittle over a decade of sun exposure.
This station is the ultimate “set it and forget it” solution, offering a clean, professional aesthetic that stands up to the elements without a single coat of paint or sealer.
11. The Kamado Ceramic Nest Station
A heavy Kamado-style grill is an impressive cooking device, capable of searing steaks at extremely high temperatures or smoking a brisket slowly for up to eighteen hours. However, its round and bulky shape can make it challenging to fit into a standard rectangular outdoor grill station.
The solution is a custom nest station, a specially designed support that highlights the beautiful profile of the ceramic cooker while also providing the additional prep space that the grill lacks on its own.
The Design: The “Horseshoe” Layout
This station moves away from straight lines to accommodate the unique ergonomics of a ceramic dome:
- The Curved Countertop: A semi-circular or horseshoe-shaped surface wraps around the back and sides of the grill.
- Open-Front Access: The supporting structure (often a curved block wall) leaves the front of the grill entirely open. This is critical for accessing the lower air vent and cleaning out ash.
- Specialized Workspace: The wide, wrap-around counter provides ample flat space for large pizza peels, heavy cast-iron grids, and butcher blocks.
Heat & Safety Essentials
Kamados hold heat exceptionally well, but the bottom of the unit can become incredibly hot during long cooks:
- The “Air Gap” Foundation: Never set a Kamado directly on a wood or combustible surface. Use a ceramic “pot feet” set or a dedicated volcanic stone base to create an air gap between the grill and the station floor.
- Countertop Clearance: Leave at least 1 to 2 inches of space between the ceramic body and the countertop cutout. This allows for natural expansion and prevents heat from being trapped against the structure.
- Hinge Clearance: Ensure the back of the station doesn’t interfere with the heavy spring-loaded hinge when the lid is fully opened.
Stability & Weather Resistance
- Massive Weight Support: A large Kamado can weigh over 200 lbs. The “nest” must be built on a reinforced concrete pad or a very sturdy masonry base to prevent the station from cracking or sinking.
- Structural Material: Because of the high heat and weight, natural stone or poured concrete are the preferred materials for the countertop. Avoid thin plastics or untreated wood.
- Drainage: Ensure the “nest” where the grill sits has a slight slope or a drainage hole. You don’t want water pooling around the base of your ceramic cooker after a rainstorm.
The Smoker’s Edge
This station is built for the serious smoking enthusiast. It transforms a standalone “egg” into a high-performance culinary hub, keeping your fuel, heat-deflectors, and heavy accessories all within a single, elegant reach.
12. The Granite-Topped Masonry L-Shape
This classic stone-and-steel outdoor grill station is the ultimate backyard upgrade. Built using concrete block construction and faced with cultured stone or real fieldstone, this massive L-shaped station anchors your entire outdoor living area.
The Layout: Prep Meets Socializing
The L-shape is the gold standard for workflow because it separates the “hot zone” from the “service zone”:
- The Cooking Leg: Houses a built-in gas grill and often a high-powered side burner for sauces or side dishes.
- The Social Leg: Provides a sprawling stone countertop for prep work and serving.
- The “Bar” Overhang: The defining feature is a 12-inch countertop extension. This creates a bar-height seating area for stools, transforming the station into a social hub where guests can chat with the chef without getting in the way of the heat.
Why the Masonry Approach Wins
- Massive Durability: This is a “generational” build. When properly constructed, masonry and granite can last decades with minimal upkeep.
- High-End Finish: Using cultured stone or fieldstone allows you to match the architecture of your home, making the station feel like a natural extension of the house.
- Integrated Storage: The hollow concrete block base provides perfect cavities for high-quality stainless steel drawers and propane tank enclosures.
Heat & Safety Essentials
- Insulated Jackets: Since a built-in grill is being dropped into a permanent structure, a stainless steel insulated jacket is usually required to protect the masonry and surrounding stone from heat expansion.
- Gas Safety Venting: Because the L-shape creates large enclosed volumes, you must install ventilation panels. These allow any leaked gas (which is heavier than air) to escape rather than pooling inside the stone base.
- Surface Heat: Granite is heat-resistant, but it can absorb and hold heat from the sun. Darker granite can become very hot to the touch; consider a lighter color or a pergola cover if the station faces south.
Stability & Weather Resistance
- Concrete Foundation: A stone L-shape is incredibly heavy. It requires a reinforced concrete footer (usually 4–6 inches thick) to prevent the structure from cracking or settling unevenly over time.
- Stone Care: While stone is durable, it is porous. Apply a penetrating stone sealer to the fieldstone or veneer every 2–3 years to prevent moisture from getting behind the stones and causing them to pop off during freeze-thaw cycles.
- Granite Maintenance: Wipe down the granite with a specialized cleaner once a month. This keeps the “mirror finish” looking new and prevents oils from the grill from staining the surface.
This station is for the homeowner who wants more than just a place to cook—it is an investment in a permanent outdoor entertainment venue.
13. The Brick Oven and Grill Hybrid Station
If you’re torn between American barbecue and Italian pizza night, the hybrid outdoor grill station offers a perfect solution. This impressive masonry project features a durable charcoal or Santa Maria-style grill right next to a wood-fired brick oven.
While it resembles a professional cooking setup, it remains in the outdoor grill category by emphasizing fire and flavor rather than plumbing or refrigeration.
The Design: A Linear Fire Zone
This station is built for the artisan cook who enjoys managing live fire. Its layout focuses on a continuous run of high-performance materials:
- The Searing Zone: A dedicated space for high-heat grilling, often featuring an adjustable-height grate (Santa Maria style) for precision temperature control.
- The Baking Zone: A classic wood-fired dome or brick oven, perfect for high-temperature pizzas, roasted meats, or hearth-baked bread.
- Integrated Fuel Storage: The masonry base often includes large, open “wood boxes” to keep logs dry and within reach for both the oven and the grill.
Why the Hybrid Approach Wins
- Fuel Efficiency: You can share wood embers between the grill and the oven, allowing you to manage two different cooking styles from the same fire source.
- Restaurant-Quality Results: The thermal mass of a brick oven provides ambient heat that a standard metal grill simply cannot replicate.
- Artisan Appeal: The massive stone-and-brick presence creates a stunning visual centerpiece for your outdoor space.
Heat & Safety Essentials
With two intense heat sources side-by-side, safety is the top priority:
- Firebrick Lining: The interior of the oven and the grill pit must be lined with high-density firebricks and refractory mortar to withstand temperatures exceeding 800°F ($427$°C). Standard red bricks will crack or explode under this heat.
- Smoke Management: Ensure the chimney height is sufficient to draw smoke away from the chef’s face and over any nearby rooflines.
- Clearances: Maintain a strict 3-foot clearance from any overhanging trees or combustible structures, as wood-fired ovens can occasionally release sparks.
Stability & Weather Resistance
- Heavy-Duty Footing: This is one of the heaviest builds possible. It requires a deep, steel-reinforced concrete pad to prevent the masonry from shifting, which would cause the oven dome to crack.
- Moisture Protection: If water gets into the masonry and freezes, it can devastate the structure.
- The Fix: Apply a breathable masonry sealer to the exterior and ensure the oven dome is finished with a waterproof “stucco” or stone layer.
- Curing the Masonry: After the build is complete, you must “cure” the oven with several small, increasingly warmer fires over a week. Heating it too fast the first time will cause moisture in the mortar to turn to steam and crack the bricks.
This station is a specialized, artisan-focused hub designed for the cook who treats fire management as a craft.
14. The Live Edge Bar and Concrete Fusion
This outdoor grill station features a modern and design-forward approach. By combining industrial materials with organic textures, it functions as both a high-performance cooking area and an artistic landscape element. It’s an ideal choice for homeowners seeking a “minimalist-meets-natural” aesthetic.
The Material Contrast
The beauty of this station lies in the “fusion” of two opposing elements:
- The Industrial Base: A sleek, monolithic base made of polished concrete or smooth, charcoal-grey stucco. This provides the weight and fire-resistance needed for a permanent build.
- The Organic Surface: A single, enormous slab of live-edge wood (such as acacia or black walnut). The natural curves of the wood contrast beautifully against the sharp lines of the concrete base.
Why the Fusion Approach Wins
- Architectural Statement: This station doesn’t just sit in your yard; it defines the style of the entire space, proving that a grill area can be visually stunning.
- Warmth vs. Cold: The wood top adds a tactile warmth that stone or steel lacks, making it a more inviting place for guests to lean and linger.
- Custom Character: Because every live-edge slab is unique, no two stations will ever look the same.
Heat & Safety Essentials
Pairing wood directly with a high-heat grill head requires precision engineering:
- The Insulated Jacket: A stainless steel insulated liner is absolutely mandatory. It acts as a thermal break between the grill’s 500°F body and the organic wood slab.
- Heat Clearances: Leave a wider-than-usual gap (at least 1 to 2 inches) between the grill jacket and the wood. This allows for airflow and accounts for the natural expansion and contraction of the wood as it heats up.
- Flash Point Awareness: Never leave high-heat tools like charcoal chimneys or hot grates directly on the wood. Always use a stone or metal “landing zone” nearby for hot items.
Stability & Weather Resistance
- Marine-Grade Protection: Standard wood finishes will fail outdoors. The live edge slab must be coated in marine-grade epoxy or a high-solids UV-rated polyurethane to prevent the wood from silvering, warping, or rotting.
- Epoxy Maintenance: While durable, epoxy can develop fine scratches over time. A quick buff and a fresh top-coat every few years will keep the “liquid glass” look pristine.
- Concrete Sealing: To prevent the charcoal-grey base from looking chalky or absorbing grease, use a penetrating concrete sealer with a “wet look” finish to match the depth of the wood.
- Expansion Management: Wood moves more than concrete. Use flexible construction adhesives or oversized mounting holes to allow the wood to “breathe” without cracking the concrete base.
This station is designed for the modern architect’s home—a perfect balance of industrial strength and natural beauty.
15. The Dual-Zone Offset Smoker Station
The final idea on our list is specifically designed for dedicated Texas-style pitmasters. A large offset smoker is long, heavy, and can be quite awkward to use without a nearby workspace. This outdoor grill station addresses that issue by featuring a long, low-profile counter that runs parallel to the smoker instead of wrapping around it.
By aligning the height of the station with the door of the smoker’s cooking chamber, you create a seamless workflow for managing even the largest and heaviest cuts of meat.
The Pitmaster’s Workflow
This station acts as a dedicated staging platform, designed to solve the specific pain points of “low and slow” cooking:
- The “Slide-and-Wrap” Surface: When you pull a heavy brisket or rack of ribs off the heat, you can slide it directly onto the station to wrap it in butcher paper or foil without lifting or carrying it across the yard.
- Fire Management Zone: There is ample space underneath the counter for seasoned wood splits, keeping your fuel dry and within arm’s reach of the firebox.
- The Prep Hub: The long, flat surface is perfect for a roll of foil, a spray bottle of apple juice, and a stack of clean towels—everything needed for a 12-hour cook.
Why the Parallel Design Wins
- Ergonomics: By keeping the station parallel and at the same height as the cooking chamber, you minimize strain on your back when handling 20-pound briskets.
- Heat Separation: Since smokers generate intense heat from the firebox end, a parallel station allows you to prep in a cooler zone while still being close enough to monitor the temp.
- Specialized Storage: The open design is perfect for storing oversized tools like long-handled ash shovels and heavy-duty coal rakes.
Heat & Safety Essentials
- Firebox Proximity: The firebox of an offset smoker gets significantly hotter than the cooking chamber. Ensure the station is positioned at least 18–24 inches away from the firebox end to prevent heat damage to your prep surface.
- Non-Combustible Surfaces: Because you will be sliding hot meat and potentially setting down hot grates, a stainless steel or stone countertop is highly recommended over wood.
- Grease Management: Smoked meats are notoriously fatty. Ensure your station has a slight slope or a “drip edge” so that grease from the wrapping process doesn’t run down the front of your cabinetry.
Stability & Weather Resistance
- Surface Durability: Choose 304-grade stainless steel or honed granite. These materials can handle the grease, salt rubs, and acidic sauces common in BBQ without pitting or staining.
- Anchoring: A long, low station can be prone to shifting. Ensure it is anchored to a level concrete pad to maintain that perfect “door-to-counter” height alignment.
- Covering the Gear: Since smokers are prone to rust, use a custom-fit cover that protects both the smoker and the adjacent station to keep the entire “pit zone” ready for action.
This is a highly specialized station that transforms the “labor” of pit-smoking into a streamlined, professional craft.
5 Upgrades That Turn Your Outdoor Grill Station Into a Chef’s Paradise
Once you have the basic structure of your outdoor grill station in place, a few thoughtful additions can dramatically improve the experience. These are the details that separate a nice-looking setup from a truly functional outdoor grill station.
Essential Upgrades for Better Functionality
To take your station to the next level, consider these five strategic additions:
- Task Lighting: Grilling after sunset is a pleasure, but only if you can see what you are doing.
- Options: Use a dimmable, hardwired LED on an adjustable arm or simple battery-operated puck lights under the countertop overhang.
- Fire Safety Essentials: A well-equipped outdoor grill station should include basic safety measures. According to NFPA grilling safety guidelines, grills must always be placed at least 10 feet away from buildings and overhanging branches. Make sure to keep a fire extinguisher or a bucket of sand within easy reach of your grill station, and never leave an active fire unattended.
- Dedicated Trash and Recycling: Walking across the yard with greasy paper towels is a major workflow killer.
- Solution: Install a pull-out bin in the base cabinet to keep the mess contained and the ground clean.
- Towel Bar and Hooks: Keep your workspace sanitary and organized.
- Setup: A stainless steel bar keeps rags within reach, while heavy-duty hooks keep long spatulas and grill brushes off the dirt.
- A Weatherproof Power Outlet: Running a GFCI outlet to a permanent station is a game-changer.
- Uses: Power a rotisserie motor, charge speakers, or run a blender without dangerous extension cords crossing the patio.
- A Weatherproof Cover Strategy: Protection extends the life of your investment.
- Strategy: A custom-fitted vinyl cover for the entire counter and grill protects stainless steel components and keeps the prep surface clean between uses.
How to Protect Your Outdoor Grill Station Year-Round
An outdoor grill station represents an investment of time and money. Protecting it through the seasons ensures you will enjoy it for a decade or more. The approach differs based on your climate and the materials used in your build.
Seasonal Care by Climate
How you maintain your station depends largely on your local environment:
- Cold Climates (Snow and Ice):
- Essential Gear: Use a heavy-duty cover with reinforced seams.
- Ventilation: Ensure the cover has air vents to prevent trapped moisture from damaging stainless steel.
- Wood Care: For wood frames or butcher block tops, apply a fresh coat of food-safe mineral oil or exterior sealant every autumn.
- Coastal or Humid Regions (Salt Air and Moisture):
- Material Choice: Stainless steel is preferred, though it still requires maintenance to prevent surface rust.
- Upkeep: Perform a monthly wipe-down with a specialized stainless steel cleaner and protectant.
- Masonry Builds (Stone and Brick):
- Protection: Apply a penetrating stone sealer every two years.
- Prevention: This stops efflorescence (white salty stains) and prevents cracking caused by freeze-thaw cycles.
FAQ
Ready to Build Your Dream Outdoor Grill Station?
We have journeyed through fifteen distinct interpretations of the outdoor grill station, from a simple folding shelf bolted to a wall to a sprawling masonry L-shape crowned with granite. The common thread is intentionality.
An outdoor grill station declares that the act of cooking outside matters; it deserves a dedicated space, a clean surface, and a place for every tool.
The Transformation of Your Space
Whether you spend a Saturday afternoon stacking cinder blocks and laying a cedar plank or hire a contractor to pour concrete and face stone, the result is the same:
- A Functional Backyard: A space that finally works as hard as you do.
- Contained Chaos: A setup where the mess of meal prep stays outside where it belongs.
- A Culinary Hub: A backyard centered around the warm, smoky heart of a well-designed station.
Bringing Your Vision to Life
We hope these ideas have sparked a vision for your own home. The perfect outdoor grill station is waiting for you to bring it to life.
Happy grilling!